Peach Cake 水蜜桃蛋糕
Egg Yolk Mixture Ingredients:
4 egg yolks (Grade A eggs)
75g corn oil
125g milk
100g cake flour or superfine flour, sifted
a pinch of salt
1/4 tsp vanilla extract (optional)
60g peaches, diced
Meringue Ingredients:
4 egg whites (Grade A eggs), cold
70g granulated sugar
1/2 tsp lemon juice or 1/4 tsp cream of tartar
Decoration Ingredients:
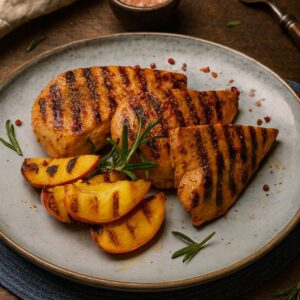
peach slices
almond flakes
Tools:
Baking paper; a cooling rack
Preparation:
Making the Egg Yolk Mixture:
1. Separate the eggs, ensuring the egg whites are free from oil and water.
2. In a bowl, combine egg yolks and corn oil, mix well. Then add in milk, stir thoroughly until fully emulsified.
3. Add salt and vanilla extract, mix with a whisk in a “Z” motion until just combined.
4. Sift in the cake flour. Continue mixing in a “Z” motion until smooth. Avoid overmixing.
5. Add the diced peaches and stir gently until well combined. Set aside.
Whipping the Meringue:
1. Place the egg whites in a clean, grease-free bowl. Add a few drops of lemon juice or cream of tartar.
2. Beat on high speed with an electric mixer until large bubbles form, then add the granulated sugar gradually.
3. Continue beating until soft peaks form (curved tips) and then whip slightly further to reach stiff peaks (straight tips with slightly curved ends).
Cooking Steps:
1. Select “Oven” mode, set temperature and time at 145°C; 55 minutes, start preheating.
2. Gently fold 1/3 of the meringue into the egg yolk mixture using a whisk.
3. Pour the combined mixture back into the remaining meringue and gently fold until fully incorporated.
4. Line the frying basket with baking paper, then pour the batter into it and smooth the surface with a spatula. Top with peach slices and almond flakes.
5. Once preheated, place it into inner pot, start baking.
6. Remove the cake from the pot and let it cool on a cooling rack. Serve once completely cooled.
Tips:
– The key to success is properly the whipped meringue: avoid under-whipping or over-whipping. Aim for soft peaks nearing stiff peaks for the best result.
– Use gentle folding techniques to prevent deflating the meringue.
– Recommended to use grill pot as the inner pot.
蛋黄糊材料:
4粒 蛋黄(A蛋)
75克 玉米油
125克 牛奶
100克 低筋面粉/特幼面粉;过筛
1小撮 盐
1/4茶匙 香草精(随喜)
60克 水蜜桃;切块
蛋白霜材料:
4粒 蛋白(A蛋),冷却
70克 细砂糖
1/2茶匙 柠檬汁 或 1/4茶匙 塔塔粉
装饰材料:
水蜜桃片
杏仁片
工具:
烘焙纸;一个冷却架
事前准备:
制作蛋黄糊:
1. 将鸡蛋分离,确保蛋白无油无水。
2. 在一个碗中,加入蛋黄和玉米油,充分搅拌至混合均匀,再加入牛奶充分搅拌至乳化状态。
3. 加入盐和香草精,用蛋抽以“Z字形”拌匀。
4. 筛入低筋面粉,继续用蛋抽以“Z字形”拌匀,避免过度搅拌。
5. 最后加入水蜜桃块,搅拌均匀,放置一旁。
打发蛋白霜:
1. 将蛋白放入一个干净,无油无水的打蛋盆中,加入几滴柠檬汁或塔塔粉。
2. 用电动打蛋器高速打至出现粗泡,然后加入细砂糖。
3. 继续打发,直到出现湿性发泡 (拉出小弯钩),再稍微打至接近干性发泡 (直立尖峰,末端微弯即可)。
做法:
1. 选择“Oven” 模式,设定温度和时间为145°C; 55分钟,开始预热。
2. 取1/3蛋白霜加入蛋黄糊中,用蛋抽翻拌均匀。
3. 将混合好的面糊倒回剩下的蛋白霜中,继续翻拌均匀。
4. 在炸篮中铺上烘焙纸,然后将面糊倒入,用刮刀抹平表面。铺上水蜜桃片和杏仁片。
5. 放入预热好的内锅中,开始烘烤。
6. 将蛋糕从内锅中取出,放在冷却架上冷却。完全冷却后即可享用。
贴士:
– 蛋白打发是成功的关键:不要过度打发或打发不足,湿性偏干性发泡最佳。
– 翻拌手法要轻柔,避免蛋白消泡。
– 建议使用烤锅作为内锅。